

 Bob Scott
Last Updated: November 17, 2026
Quick Summary
The best way to organize crankbaits in boat storage is to hang each bait individually on a foam-filled hanger or clip strip mounted inside the compartment, so hooks stay separated and every lure stays visible. Easy View Tackle builds this system around a simple idea: a bait you can see is a bait you can grab in seconds.
- Loose crankbaits in one space tangle treble hooks and cost you fishing time.
- Each Easy View Tackle unit includes hardware for adhesive or screw mount application.
- Sort crankbaits by diving depth first, then size, then color.
- Hang wet lures to air out and leave compartment lids open overnight.
- Mount hangers above the lowest corner where water collects in a compartment.
Table of Contents
- Why Crankbait Storage in a Boat Fails Before You Ever Cast
- The Best Way to Organize Crankbaits: Hang Them, Don’t Pile Them
- How to Set Up Crankbait Storage in a Boat Compartment, Step by Step
- Building a Boat Tackle Storage Plan Around Your Fishing Style
- Sorting Crankbaits by Size, Diving Depth, and Color
- Drying Wet Lures and Keeping Hooks Rust-Free
- Mistakes That Undo a Good Crankbait Storage Setup
- Build Your Crankbait Storage Setup with Easy View Tackle
- Frequently Asked Questions
Why Crankbait Storage in a Boat Fails Before You Ever Cast
Crankbait storage in a boat fails when loose baits share one space, because treble hooks find each other and every tangle costs you fishing time. At Easy View Tackle, we hear the same story from anglers: the first cast of the day goes fine, then the search begins. You open a compartment, dig through a pile of baits, and pull out three crankbaits locked together by their hooks.
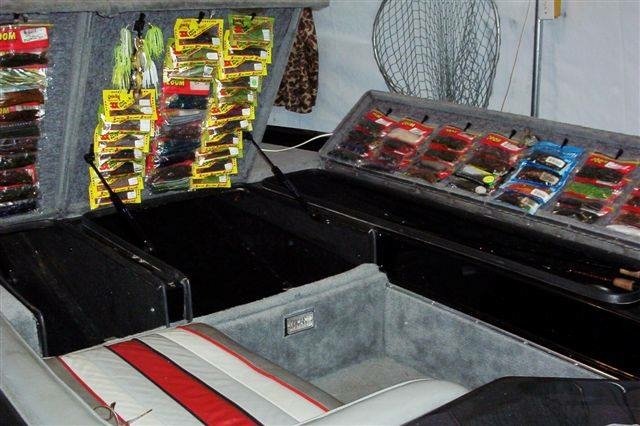
That is not a storage problem. It is an access problem.
The Tray-and-Bag Problem: Treble Hooks, Tangles, and Lost Time
Traditional tackle trays and bags stack baits against each other. Crankbaits carry two or three treble hooks each, and those hooks grab everything nearby. A single tangled pair can take a minute to separate.
Piles also hide your baits. If you want a deeper look at avoiding crankbait tangles, our guide on how to store crankbaits without tangles walks through it.
What Hanging Baits Change About Lure Selection
Hanging changes the math. When every bait hangs on its own hanger, you see the whole row at a glance. Color, size, and diving depth are all visible without moving a single lure.
That matters most when the bite changes. Bass push bait shallow, and you need a shallow-diving bait now, not after five minutes of digging. Hanging baits turn lure selection into a glance instead of a search.
The Best Way to Organize Crankbaits: Hang Them, Don’t Pile Them
The best way to organize crankbaits in boat storage is to hang each bait individually on a foam-filled hanger or clip strip mounted inside the compartment, so hooks stay separated and every lure stays visible.
Here is what hanging solves:
- No hook tangles. Each bait sits on its own hanger.
- Full visibility. You see the whole row, not just the top layer.
- Dry storage. Baits hang in open air, where they can dry.
The crankbait hanger itself is foam-filled, which protects hooks and keeps baits from swinging into each other. That is the core of the system, and everything else builds around it.
How to Set Up Crankbait Storage in a Boat Compartment, Step by Step
Setting up crankbait storage takes three steps: measure your mounting spots, mount the hangers and clip strips, then sort and hang your baits.
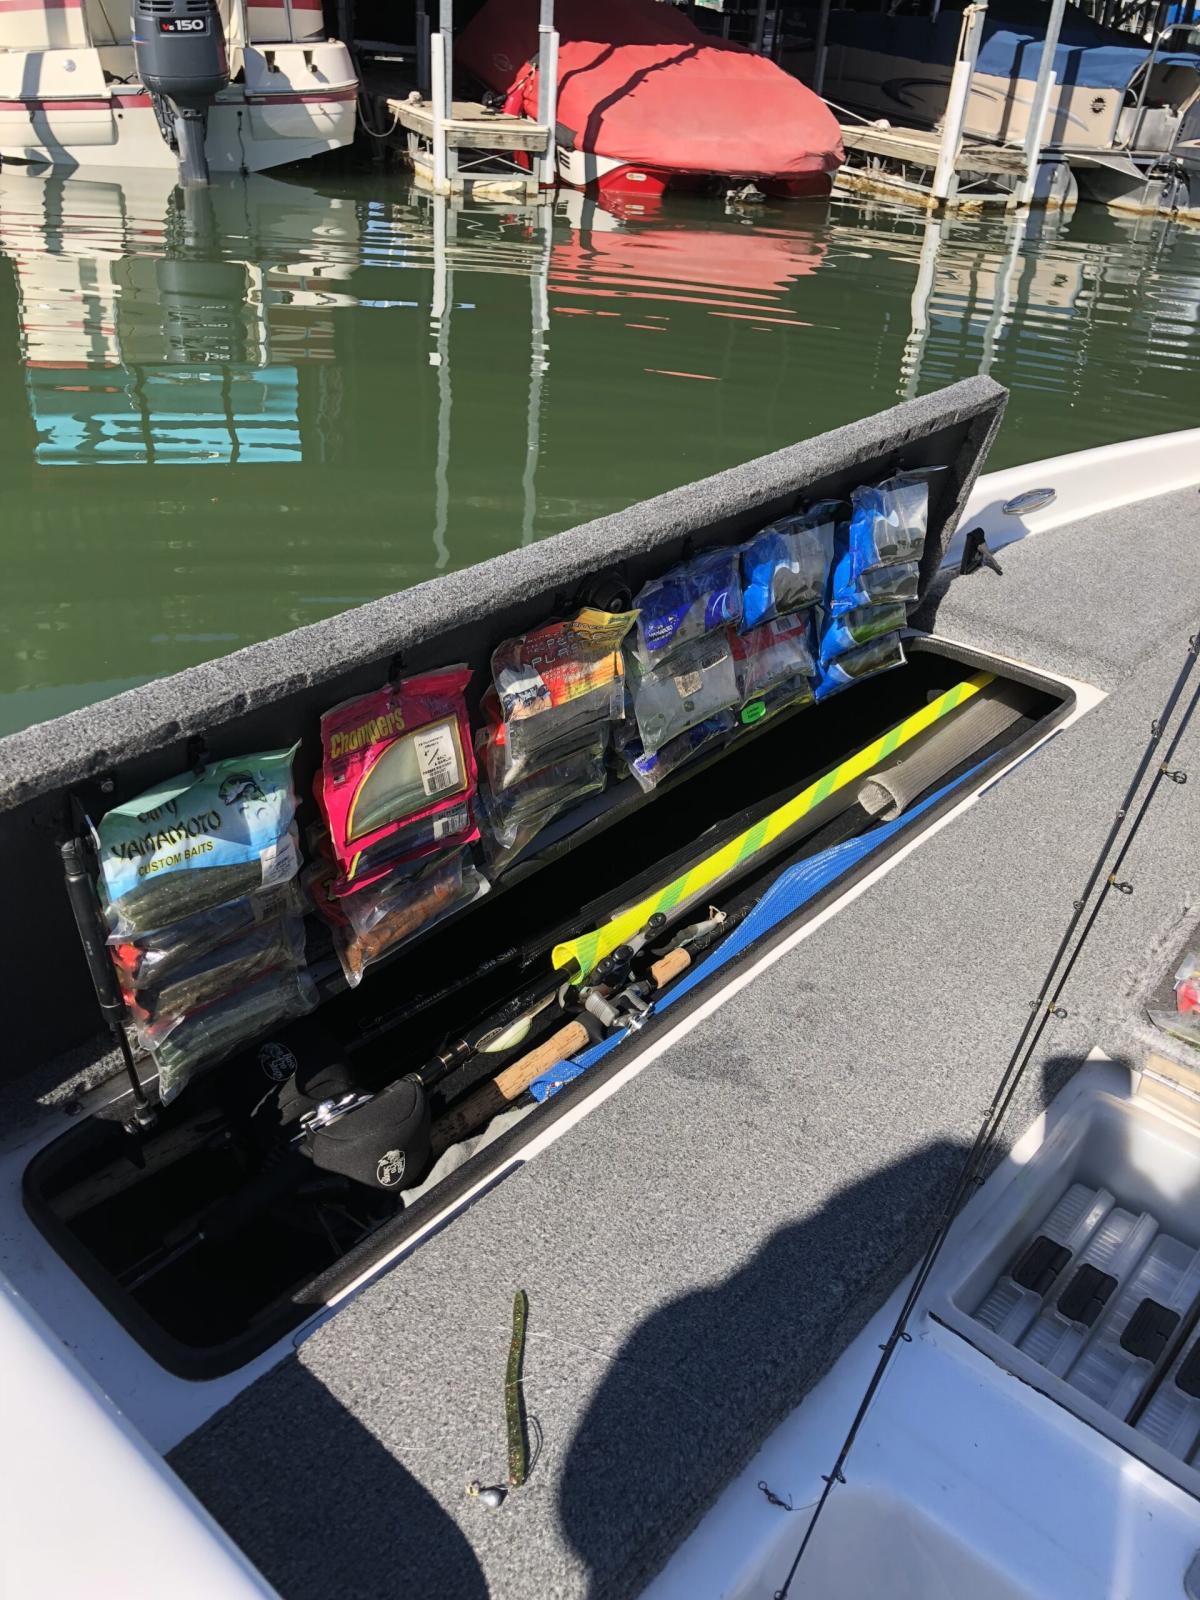
Step 1: Measure and Choose Your Mounting Spots
Start with a tape measure and an honest look at your compartments. You want spots that stay dry and that you can reach without leaning over the console at speed.
Good mounting spots include:
- The inside of compartment lids
- Vertical walls inside storage boxes
- Underside surfaces above the bait pile
Before you measure, read our guidance on fitting tackle organization into tight boat compartments.
Watch out: mounting a hanger where a lid or cooler will swing into it is the most common installation mistake. Measure the swing path, not just the flat surface.
Step 2: Mount the Hangers and Clip Strips
Each Easy View Tackle unit includes hardware for adhesive or screw mount application.
For full mounting instructions, follow our step-by-step guide on how to mount tackle clips on your boat. It covers surface prep, hardware choice, and how to space units so baits hang clear of each other.
Clip strips handle soft plastics, spinnerbaits, buzzbaits, and other hanging baits. That means one system covers crankbaits and the rest of your hanging tackle, not just one category.
Step 3: Sort, Hang, and Label
Hang baits in a fixed order and label the row. A simple label on the compartment edge, like “shallow,” “mid,” or “deep,” saves you from reading every bait.
Sort by what you reach for first. Tournament anglers usually sort by diving depth, then color. Weekend anglers often sort by bait size.
Here is the setup sequence at a glance, from measuring to labeling.
| Step | What to do | Key detail |
|---|---|---|
| Step 1 | Measure and choose mounting spots | Inside lids, vertical walls, undersides above the bait pile |
| Step 1 | Check the swing path | Most common installation mistake is a lid or cooler hitting the hanger |
| Step 2 | Mount hangers and clip strips | Hardware included for adhesive or screw mount |
| Step 2 | Space units so baits hang clear | Clip strips also hold soft plastics, spinnerbaits, buzzbaits |
| Step 3 | Sort, hang, and label | One bait per hanger, fixed order |
| Step 3 | Label the row | Compartment edge labels like shallow, mid, or deep |
Building a Boat Tackle Storage Plan Around Your Fishing Style
Your boat tackle storage plan should match how you actually fish, not how a catalog says you should. A tournament angler and a weekend angler need different layouts, and the Easy View Tackle system scales to both because hangers and clip strips mount individually inside compartments and under lids.
Choose between a compact working selection and a larger onboard inventory based on how you fish. The goal is to keep every bait visible and reachable, whether you carry a dozen crankbaits or several rows.
Compact Working Selection vs. Full Onboard Inventory
A compact working selection is the right call when you fish short trips, run a few rods, or fish from a smaller boat with limited compartment space. Mount one or two crankbait hangers and a single clip strip in the compartment you open most, usually the one nearest the front deck.
A full onboard inventory makes sense when you fish long trips, run multiple rods, or fish tournaments where the bite can change from shallow to deep in an afternoon. Keeping each depth zone visible also makes it easier to coordinate shared compartments and avoid mixing tackle when several anglers are aboard, a concern that connects with Lichner Homes.
Match the Layout to Target Species, Water Depth, and Time on the Water
Ask three questions before you mount anything:
- What depth range will you fish most? If you expect to fish shallow cover, put shallow-diving crankbaits on the row closest to the lid. If you expect to fish ledges or deep structure, give deep-diving baits the most accessible row.
- How long are your trips? Short trips need only the baits you will throw. Long trips need backups, so add a second row or a second compartment rather than overloading one hanger.
- How many rods do you run? More rods means more bait changes, which means faster access matters more. Mount hangers where you can reach them without leaning over the console at speed.
Solo vs. Partner Layouts
If you fish alone, you can dedicate one compartment to crankbaits and one clip strip to soft plastics and skirted baits, all within arm’s reach of the driver’s seat or front deck.
For a new boat owner still figuring out a lure lineup, start small. One clip strip and a few hangers will teach you more about your own habits than a full wall of baits.
Sorting Crankbaits by Size, Diving Depth, and Color
Sort crankbaits by diving depth first, then size, then color. Depth is the variable that changes fastest on the water, so it deserves the most visible position. A repeatable workflow keeps the system fast all season and is the part most storage advice skips.
A Repeatable Sorting and Labeling Workflow
Follow the same sequence every time you add baits or reset a compartment:
- Clear the row. Take every bait off the hangers and clip strips so you start from a clean slate.
- Group by depth. Make three piles: shallow-diving, mid-depth, and deep-diving. If a bait’s depth is unclear, check the package or the manufacturer’s published dive curve rather than guessing.
- Sort within each depth group by size. Put smaller baits together and larger baits together so the row reads cleanly at a glance.
- Separate colors within each size group. Keep similar shades together, and put your most-used color first in each group.
- Hang in a fixed order. Shallow-diving baits on the top row closest to the lid, mid-depth in the middle, deep-diving on the bottom row. One bait per hanger so hooks stay separated.
- Label the row. Put a simple label on the compartment edge, like “shallow,” “mid,” or “deep,” and add color notes if a row holds several shades. A label saves you from reading every bait.
- Reset once a month. Baits drift out of order, so run the same sequence again to keep the system consistent.
Why Hanging Beats Trays for Sorting
Color separation is where hanging beats trays by a wide margin: in a tray, the bait you want is usually under three others. On a hanger row, every color, size, and diving depth is visible without moving a single lure. That visibility is what makes the sorting workflow worth maintaining.
Keep your most-used colors at eye level. If you throw a shad pattern more than anything else, that bait should be the first one you see when the compartment opens.
Watch out: labeling by depth only works if you re-check baits after switching line or adding a leader, since those changes can shift a crankbait’s running depth. Re-sort any bait whose depth range no longer matches its row.
Drying Wet Lures and Keeping Hooks Rust-Free
Wet lures stored in a closed tray stay wet, and wet hooks rust. Hanging baits dry in open air, which is the simplest rust protection you can build into a boat.
Build a drying routine into the end of every trip:
- Hang wet lures on the hangers to let them air out
- Leave compartment lids open overnight when the boat is parked
- Wipe down hooks that saw heavy use before storing them
Mistakes That Undo a Good Crankbait Storage Setup
Most storage setups fail for a handful of predictable reasons. Fix these and the system holds up all season.
- Overloading a hanger. Two baits on one hanger defeats the purpose. One bait, one hanger.
- Mounting in a wet spot. Water collects in the lowest corner of a compartment. Mount above it.
- Skipping the label. An unlabeled row becomes a puzzle after a month.
Watch out: clean and dry the surface before you stick anything down.
Build Your Crankbait Storage Setup with Easy View Tackle
The Easy View Tackle system gives you a way to organize crankbaits in boat storage. Foam-filled crankbait hangers protect hooks. Patent-design clip strips hold soft plastics, spinnerbaits, and buzzbaits.
Professional B.A.S.S. angler Lance Vick endorses the system.
The Easy View Tackle System is the core setup the rest of this article builds toward.
Your baits should be the easiest thing on the boat to find, not the hardest.
Frequently Asked Questions
How do you keep crankbait hooks from tangling in boat storage?
The cause of most hook tangles is baits sharing one space, with treble hooks grabbing each other as the boat moves. Hanging each crankbait on its own foam-filled hanger keeps hooks separated. Easy View Tackle’s clip strips do the same job for soft plastics, spinnerbaits, and buzzbaits.
What is the best way to organize crankbaits by size and diving depth?
Group shallow-diving baits on one hanger run and deep-diving baits on another, then order each group from smallest to largest. That layout matches how you actually choose a lure: pick the depth first, then the size. Keep color families together within each group so you can scan a row and grab the shade you want. Label the end of each run with a short tag, and the whole row becomes a lookup instead of a search.
Will an adhesive mount hold up in rough water?
Easy View Tackle includes hardware for both adhesive and screw mount applications, so you can choose the method that suits your boat.
Does the Easy View Tackle system handle soft plastics too, or only crankbaits?
Both. Foam-filled crankbait hangers hold treble-hook baits, and the patent-design clip strips hold soft plastics, spinnerbaits, buzzbaits, and other hanging baits. The system is customizable, so you decide how many hangers and strips to use.
